Wednesday, February 24, 2010

ViewNX Picture Control

When you shoot Nikon RAW, the picture control that you have specified is not applied to the raw image. It is only applied to jpeg images. The picture control can still be applied using ViewNX. I downloaded Fuji Velvia, Kodak Ektachrome, and Kodak Kodachrome 2 pictures controls and installed them on my D90 and ViewNX.

You can create your own Picture Controls using ViewNX and you can find some on the web. I use the ones created by Jake Khuon. A website that goes more into the theory of it and has links to Jake's picture controls is: http://esfotoclix.com/tech/picctrl/. The url to the picture controls is: http://www.neebu.net/~khuon/photography/NIKON/CUSTOMPC/.

I have taken a RAW picture that I took using a D40 and applied each picture control. A lot of the time I couldn't see much difference, but occasionally the difference was dramatic. Looking at the following images, it is difficult to see the differences between the different Picture Controls. To see them better, you can open a couple of browsers on this blog and then select the various pictures to view them side by side. Here are the images.

Standard

Neutral
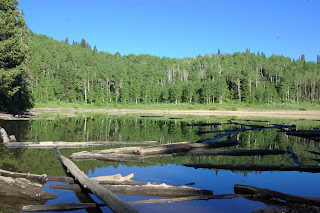
Vivid

Monochrome
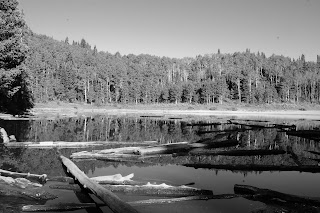
D2XMODE1

D2XMODE2

D2XMODE3

Portrait

Landscape

Fuji Velvia

Kodak Extachrome

Kodak Kodachrome 2

D40 Recorded Value


Picture Controls can be used to produce a certain look automatically or allow you to wait until you start processing RAW files to see which Picture Control looks best.

With ViewNX there is the ability to create you own Picture Controls. There are a number of sites on the web that describe how to do this.

Tuesday, February 9, 2010

Panoramic Pictures


Panoramic pictures are something that have fascinated me for some time. I live in the west where most of the time, the vistas I see cannot be captured on one frame, even if I am using a wide angle lens. Programs such as Photoshop Elements from Adobe make it very easy. The version I use is version 7.

My family was recently on a trip to California and a storm was forecast to move in one the morning we were leaving. Having to chain up going over the Sierras is not fun. If we left too late, I might have had to chain up multiple times going through Nevada on I-80. Needless to say, we left early in the morning. After crossing the summit on the eastern side of the Sierras there is a lake called Donner Lake. We were making good time so we stopped and drove along the shore of the lake until we found an access point. It was a dark heavily clouded morning. I took a number of pictures, and made sure that on seven of them I overlapped each side by at least 20%. I then used Photoshop Elements to stitch them together. Here are the seven individual pictures.


You will notice, especially on the left side of the panoramic picture that the top of the mountain is cut off. This is because as Photoshop Elements fits things together the center is narrower in height than the sides images are. When you crop the image, you tend to lose the tops and the bottoms of the beginning and ending pictures. So when you take images for combining in a panoramic remember to leave plenty of space for cropping.

The pictures were taken with a Nikon D90 at F/13 at 1/45s.