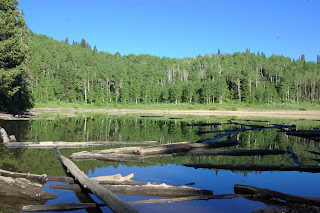
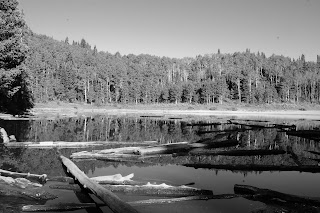
Photographers normally quit taking pictures when the sun goes down. I recently took a hike into the high Wasatch Mountains that started too late in the day. My destination was Lake Blanche up Big Cottonwood Canyon. My group didn't start hiking until about 4:30 and it took us three hours to complete the hike. When we reached the lake, the sun had gone down and just a few of the mountain ridges were in the sunlight. I decided to take a chance and set my camera to shoot three frames: -2, 0 and +2. This resulted in exposures of 1/45s at F/8, 1/20s at F/8, and 1/3s at F/8. Luckily there wasn't any wind. I combined the three exposures with Essential HDR Standard Edition and this is the resulting picture.
I can tell you that it was actually darker than this picture shows. About 25 minutes later, I took a series of three shots of the two sister lakes by Lake Blanche. I could barely see them. The shots were taken at F/8 at 1/6s, 1/1.1s, and 1/2.5s. After combining them with my HDR program this is what I got.
So don't forget that you can continue to take pictures even after the sun goes down. By the way, these I could barely see these additional lakes.
Sunday, October 17, 2010
Tuesday, May 25, 2010
Brief Introduction to Shutter Speed, Aperture, and ISO
There are two sides to photography, just like there are two sides to the human brain. In photography, we have the technical side which deals with the camera and how it works. Photography also has the artistic side which deals with how the picture is composed. The purpose of a camera is to help the photographer be able to express their artistic image ideas. Some cameras do it better than others. Although a point and shoot camera can take a very nice artistic image, the DSLR makes it easier to do.
We will be looking at both the technical side of Nikon Digital SLRs and how to use them to create the image we want to record.
A Light Tight Box
A camera is essentially a light tight box with a lens that can focus light reflected by or generated by objects in the world outside of the camera. On a digital camera this light is focused onto a sensor that records the light. The camera then uses firmware to interpret the digital data and create either a RAW or JPG file. Nikon DSLR cameras can create both at the same time. This sensor has a certain sensitivity to light which is measured by an ISO number. The camera can adjust the sensitivity to make it either more or less sensitive to light within the constraints of the sensor. This is what produces the various ISO values that the camera can have. The more sensitive the sensor is to light, the higher the ISO. There is a side effect to this and that is called noise. Noise causes the image to degrade. The Nikon DSLR cameras have gotten quite good at limiting the noise at higher ISO numbers. Most Nikon DSLR cameras produce acceptable images at 1600 or 3200 ISO.
Shutters
A camera also has a shutter that opens to let the light that is coming through the lens enter the camera, be recorded by the sensor, and processed by the camera, and written to the SD card. The shutter can be set to different speeds to control the amount of light that enters the camera. The side effect of the shutter is that a shorter shutter speed tends to stop motion while a longer shutter speed shows motion as a blur.
Lenses
There are two types of lenses for Digital SLR cameras. Prime also known as Fixed Focal Length lenses and zoom lenses. A prime lens may be a wide angle, normal, or telephoto. Zoom lenses may also be wide angle, normal, or telephoto. The difference being that a zoom lens can be adjusted to more than one focal length. All of these lenses have an aperture which is settable to different opening sizes called f/stops. The wider the aperture, the more light that is allowed to pass through the lens, the smaller the aperture, the less light that is allowed to pass through the lens. The side effect of this is that as the aperture gets wider, less and less of the picture can appear to be in focus. As the aperture gets smaller, more and more of the picture can appear to be in focus. The reason why an area appears to be in focus is because only one point in space is actually in focus at one time. As objects are located further and further away from the point of focus, the less they are in focus. Our eyes interpret images that are of a certain degree of focus to be in focus.
Metering
So we now have three things that determine the amount of light the camera gets and interprets. The ISO, shutter speed, and lens aperture. DSLRs have the ability to measure the amount of light they are receiving at the sensor and based upon the ISO, determine if the picture is properly exposed. This is a fairly arbitrary determination. Historically, cameras determined that a picture was properly exposed if the area being metered evaluated to the equivalent color of an 18% grey card. The Nikon DSLR still does that in spot and center weighted metering. Matrix metering basically does the same but the image is split up into sections and each section is evaluated and compared against a historical database within the camera to determine if the exposure is correct. But for our purposes we can assume that to be properly exposed a certain amount of light has to reach the sensor based upon what the camera ISO setting.
As ISO settings change they make the sensor either twice as sensitive or half as sensitive. In other words ISO 200 make the sensor twice as sensitive as ISO 100 but ½ as sensitive as ISO 400. Nikon DSLR cameras normally have the ISO values of 100, 200, 400, 800, 1500, 3200, and 6400.
As shutter speeds change they let in ½ as much light or twice as much light. For example, 1/60th of a second keeps the shutter open 1/2 as long as 1/30th of a second, but keeps the shutter open for twice as long as 1/120th of a second. This translates in more or less light entering the camera. Shutter speeds, in full exposure increments are 1, ½, ¼,1/8,1/16, 1/30, 1/60, 1/125, 1/250, 1/500, 1/1000, 1/2000, and 1/4000. Shutter speeds can also be greater than 1 second. In fact a shutter may be kept open for an arbitrary amount of time when in the bulb setting.
As apertures change they let in ½ as much light or twice as much light. For example, f/5.6 lets in twice the light of f/8 but ½ the light of f/4. F/stops follow a geometric sequence. Going from the widest opening to smallest opening, these values are: f/1, f/1.4, f/2, f/2.8, f/4, f/5.6, f/8, f/11, f/16, f/22, f/32, etc.
Since each of these three settings ISO, shutter speed, and aperture are changeable in increments, normally by 1/3, 1/2, or 1 exposure value. Changing these various values allow you to artistically control the image. However, if you want to keep the same exposure you have to change two of them at a time. One will allow more light to reach the sensor, while the other setting will reduce the amount of light that reaches the sensor by the same amount. This keeps the same amount of light hitting the sensor and keeps a proper exposure.
For example, if the proper exposure at any given ISO is 1/6oth of a second at an f/stop of f/4, then you can change the f/stop to f/5.6 and the shutter to 1/30th of a second and obtain the same exposure.
Exposure Compensation
What the camera determines is proper exposure and what the photographer considers proper exposure are rarely the same. This is because of the ability of photographers to express themselves artistically. So they may want the image to be either underexposed or overexposed as far as the camera is concerned. When that is the case, you use your exposure compensation button. If you are in manual mode, the camera takes the exposure compensation into effect when showing over/under exposure in the viewfinder. For example, if the non compensated correct exposure is f/8 at 1/125 second and you add a -1 exposure compensation, then the meter will say that f/8 at 1/125 is one stop over exposed. In this example, the meter will indicate correct exposure if you have the settings at f/5.6 at 1/125 or f/8 at 1/250 second. If you are in aperture priority or shutter priority the camera will automatically adjust the shutter or aperture to get the proper compensated exposure. In manual mode whether you change it to f/5.6 at 1/125 or to f/8 at 1/250 depends on whether you want to change the depth of field or the stop action speed of the shutter.
Wednesday, May 5, 2010
Remote Shutter Release/Intervalometer for D90
I recently bought a remote shutter release/intervalometer for my D90. I bought it from Amazon although I think there are places where it is less expensive. The first one I received broke the first time I used it. The plug that plugs into the D90 GPS socket broke in two when I pulled it out. I called the company that I bought it from and they had a new one to me in two days. The second one has been working great.
I have always been interested in time lapse photography so tonight I tried it. Cloud cover was moving in so I put my camera on a tripod and pointed it to the west. I then noticed what the shutter and aperture were when I focused it and then changed the white balance, shutter speed, f/stop, and focus to manual. I set the timer to take a picture forever every three seconds. I then sat back and read a book for about 30 minutes. Not having QuickTime Pro, I used Windows Movie Maker and after changing the options to 0.125 seconds for each frame with a 0.25 interval I got the movie. I think it was pretty good for my first time. I'm looking forward to shooting star trails and a star time lapse movie.
You can see it at:
Sunday, March 28, 2010
HDR, How Many Shots are Needed?
The other day I was reading a Forum on Nikon D90. Someone asked how many bracketed shots were needed to make a good image. The Nikon D90 supports three bracketed shots although you can change the number of F/Stops between each shot. The camera also support bracketing by white balance and shutter speed, but for HDR, you want to keep the same aperture and vary the shutter speed.
I decided that I would do an experiment because I normally go with the three shots. I should state that when I use HDR I am trying to make a landscape picture that captures a fuller range of the values that the human eye sees, not what could be considered an image with unreal colors.
So I went up into Big Cottonwood Canyon here in Salt Lake and stopped at Storm Mountain. That is a beautiful rugged area, although it is prettier in the summer than it is in the winter. It was about 6pm at night. I took the following exposures.
-4 EC 1/3000s F/11
-3 EC 1/1500s F/11
-2 EC 1/750s F/11
-1 EC 1/350s F/11
0 EC 1/180s F/11
+1 EC 1/90s F/11
+2 EC 1/45s F/11
+3 EC 1/20s F/11
+4 EC 1/10s F/11
These were taken by setting my bracketing to three frames, 1 f/stop apart. I then set my exposure compensation to -3 and took the -4, -3, and -2 shots. I then set exposure compensation to 0 and took the -1, 0, and +1 shots. Exposure compensation was then set to +3 and shots +2, +3, and +4 were taken.
I then produced three images using the software package Essential HDR Standard Edition.
The first image contains all nine shots.
The second image has three shots with each of them being 1 f/stop apart. The middle shot has an exposure compensation of +0.
The third image has three shots with each of them being 2 f/stops apart. The middle shot has an exposure compensation of +0.
The fourth image has three shots with each of them being 3 f/stops apart. The middle shot has an exposure compensation of +0.
Although I think that the thee shot with one f/stop difference is acceptable, the nine shot appears to have more detail to it. So if you have the time and can make sure you don't change the position of your camera, the nine shots will most likely give you a better image.
I think that this image is not a real good image to have done the test with. I'll have to try a different subject sometime.
Labels:
Big Cottonwood Canyon,
HDR,
Nikon D90,
Storm Mountain
Wednesday, February 24, 2010
ViewNX Picture Control
When you shoot Nikon RAW, the picture control that you have specified is not applied to the raw image. It is only applied to jpeg images. The picture control can still be applied using ViewNX. I downloaded Fuji Velvia, Kodak Ektachrome, and Kodak Kodachrome 2 pictures controls and installed them on my D90 and ViewNX.
You can create your own Picture Controls using ViewNX and you can find some on the web. I use the ones created by Jake Khuon. A website that goes more into the theory of it and has links to Jake's picture controls is: http://esfotoclix.com/tech/picctrl/. The url to the picture controls is: http://www.neebu.net/~khuon/photography/NIKON/CUSTOMPC/.
I have taken a RAW picture that I took using a D40 and applied each picture control. A lot of the time I couldn't see much difference, but occasionally the difference was dramatic. Looking at the following images, it is difficult to see the differences between the different Picture Controls. To see them better, you can open a couple of browsers on this blog and then select the various pictures to view them side by side. Here are the images.
Standard
Neutral
Vivid
Monochrome
D2XMODE1
D2XMODE2
D2XMODE3
Portrait
Landscape
Fuji Velvia
Kodak Extachrome
Kodak Kodachrome 2
D40 Recorded Value
Picture Controls can be used to produce a certain look automatically or allow you to wait until you start processing RAW files to see which Picture Control looks best.
With ViewNX there is the ability to create you own Picture Controls. There are a number of sites on the web that describe how to do this.
Tuesday, February 9, 2010
Panoramic Pictures
Panoramic pictures are something that have fascinated me for some time. I live in the west where most of the time, the vistas I see cannot be captured on one frame, even if I am using a wide angle lens. Programs such as Photoshop Elements from Adobe make it very easy. The version I use is version 7.
My family was recently on a trip to California and a storm was forecast to move in one the morning we were leaving. Having to chain up going over the Sierras is not fun. If we left too late, I might have had to chain up multiple times going through Nevada on I-80. Needless to say, we left early in the morning. After crossing the summit on the eastern side of the Sierras there is a lake called Donner Lake. We were making good time so we stopped and drove along the shore of the lake until we found an access point. It was a dark heavily clouded morning. I took a number of pictures, and made sure that on seven of them I overlapped each side by at least 20%. I then used Photoshop Elements to stitch them together. Here are the seven individual pictures.
You will notice, especially on the left side of the panoramic picture that the top of the mountain is cut off. This is because as Photoshop Elements fits things together the center is narrower in height than the sides images are. When you crop the image, you tend to lose the tops and the bottoms of the beginning and ending pictures. So when you take images for combining in a panoramic remember to leave plenty of space for cropping.
The pictures were taken with a Nikon D90 at F/13 at 1/45s.
Labels:
Donner Lake,
Nikon D90,
panoramic,
photography,
Winter
Subscribe to:
Posts (Atom)